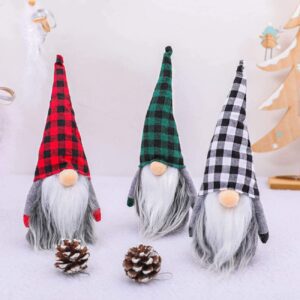
Looking to infuse your holiday decorations with a bit of enchantment this year? We’ve got just the DIY task for you: crafting gnome Christmas ornaments. These adorable figurines will bring a sprinkle of festive charm to your decor, making your Christmas celebrations all the more memorable. But don’t delay, Christmas is fast approaching and these captivating ornaments are waiting to be brought to life. Follow our detailed guide on how to make gnome Christmas ornaments and turn your home into a festive fairy tale. Let’s start creating!
Materials Needed
To ensure that you have everything you need to make charming gnome Christmas ornaments, this section with materials needed with Gnome Bodies, Felt for Hats, Faux Fur for Beards, Wooden Beads, Yarn or String, Glue Gun, and Scissors will be your handy guide. Now, let’s dive into the specifics of each sub-section to make sure you have all the necessary materials to create these delightful ornaments.
Gnome Bodies
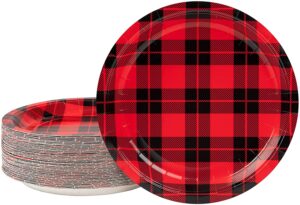
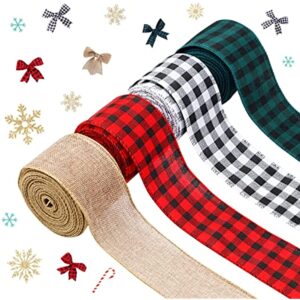
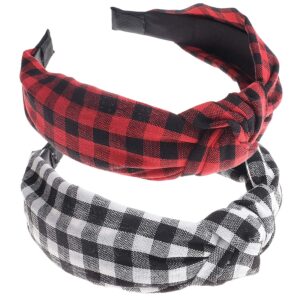
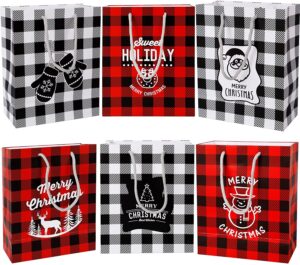
Crafting tiny gnome figurines? Essential! Create a strong base structure. Use special tools to form a core shape. Later, decorate and detail it. For inspiration and unique ideas, you can Discover Buffalo Plaid Ornaments to elevate your crafting game. Sturdy modules provide reliable foundations.
You will need clay to make the body. Balance is key! Use wire armature for strength to stop it from wobbling, tilting, or toppling over.
Crafters often use pre-made bases of wood or plastic. But, try alternative materials like bean bags. This adds weight, giving stability. Experiment and test alternative materials to get surprising results in your final product.
Felt for Hat
Felt comes in many colors, textures, and thicknesses. It is made from wool, fur hairs, or fibers that are held together through moisture and pressure. Natural felt is breathable and strong, making it great for hats that will be used often and during multiple seasons. Synthetic felts are also available and offer a larger palette of colors and patterns.
Felt can be molded with steam and tools to create customized designs or forms. To keep felt hats in perfect condition, it’s essential to store them correctly to stop flattening or discoloration.
Not all felts are the same. Different types have different uses according to the design needs. Therefore, it’s important to choose the right one based on color, texture, and density when creating felt hats.
Faux Fur for Beard
Faux Fur for a Mansome Look!
If you’re trying to rock a manly bearded look, faux fur is a great option. Here are five things to remember when using it:
| – It’s an affordable alternative to human hair or real animal fur. |
| – Using faux fur is an ethical practice – no harm to animals. |
| – It’s durable and flexible, perfect for intricate styles. |
| – Comes in different colors, textures, and lengths to suit your style. |
| – Look after it properly to make it last longer. |
When buying faux hair for your beard, make sure you trust the supplier. Don’t sacrifice quality for a cheaper price.
Wooden Beads
The delightful round-shaped wooden beads known as Timber Beads are used for crafting globally. They come in a plethora of sizes and shapes to fit different designs. Painting them is easy and they don’t need much maintenance. Plus, they’re eco-friendly and biodegradable!
Wood also has unique grain patterns, which give accessories an organic look. The non-absorbent nature of wood beads makes them resistant to moisture and sweat, making them a great choice for jewelry.
These beads are inexpensive and easily accessible, so DIY lovers enjoy using them. They can be styled into intricate designs, such as keychains, bracelets, necklaces, and wall hangings, through threading, knotting, or weaving.
Yarn or String
Yarn or String is a must-have for crafting. It’s a long and flexible cord made from natural or synthetic fibers. It can be woven, knitted, or crocheted.
When selecting the right yarn or string, here are some factors to consider:
- Fiber Content: Wool, cotton, acrylic, silk, or blends?
- Weight Category & Gauge: Check the gauge needed for your pattern.
- Color: Compare hues that complement each other.
- Texture: Smoothness, softness, coziness, roughness, etc.
Yarn or String comes in different forms, too. These are balls/skeins, hanks/loops/folds, and cones/spools. Mixing them up can affect their performance.
To get the most from your yarn, consider the pattern type, fiber content, and gauge range. Also, read the product label carefully. This way, you can get the right amount and durability for your project.
Glue Gun
The Hot Melt Adhesive Applicator, aka the “glue gun”, is an essential tool for DIY projects. Here’s how to use it:
- Plug in the device and switch on the power source. Please wait a minute or two for it to heat up.
- Gently press the trigger and apply pressure. This will control the flow rate, depending on what you need.
- Once you’re done, turn off and unplug the device, but keep the glue stick in its position as it will harden after cooling.
Plus, there’s a cordless, battery-operated variant – great for fieldwork or camping!
Scissors
Scissors are cutting tools with two sharp blades. They are made from metals like stainless steel, titanium, or carbon steel. They are essential for art and craft, sewing, tailoring, and hairdressing.
There are different sizes and designs – straight edge, curved edge, and serrated edge. Electric scissors are also available. They operate on battery or electricity. These are useful if manual dexterity is an issue, or for thick materials such as cardboard or rubber.
Choose the right pair of scissors for the task. For example, use sewing scissors only for the fabric to avoid dulling them too soon. Use safety scissors with rounded tips when cutting paper with children to avoid injury.
Regular cleaning, sharpening, and lubrication are needed for proper care and maintenance. To keep them safe, store them in a protective case when not in use.
Steps to Make Gnome Christmas Ornaments
To make gnome Christmas ornaments with ease, follow the steps outlined in “Steps to Make Gnome Christmas Ornaments.” Begin by learning how to create the perfect hat, followed by adding a fluffy beard. Attach the wooden bead nose and form the body, then secure the hat to the body. Finally, add some character by incorporating yarn or string to complete your festive decoration.
Making the Hat
Creating a Gnome’s Hat
A unique hat is needed to make any Gnome Christmas ornament. Follow these steps to make the perfect hat:
| Step | Instructions |
|---|---|
| 1 | Cut a rectangle out of felt with 4×7-inch dimensions. |
| 2 | Fold it in half, and pin the long edges together. |
| 3 | Stitch along the small end of the felt. |
| 4 | Turn it inside out so the stitches are not visible. |
| 5 | Make a flat base, where both corners meet: stitch. |
| 6 | Attach to the gnome’s head with hot glue or another adhesive. |
For an extra touch, add tassels or pom-poms to the base of the hat!
Making a great hat for your gnome ornament is easy with the steps above.
Keep exploring our article for creating the molded clay noses – another part of your Christmas décor.
Adding the Beard
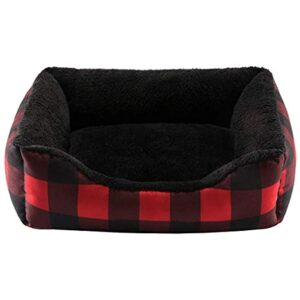
For a total gnome ornament look, ‘Attaching the Furry Chin’ is important. Before you get started, you may want to read more on buffalo plaid to add a unique style to your gnome ornaments. Here are some steps to follow:
- Glue hot glue on the bottom of the hat.
- Put the faux fur along the edge of the hat to make sure it sticks.
- After gluing the faux fur, put more hot glue to secure it.
- Cut away any extra material with scissors or a knife. Make sure you are close enough so no stitches or loose threads show.
- Cut out a puffy white ball from cotton and attach it with glue, like a gnome’s beard.
- Use small dots of glue to stick the pompoms evenly across your beard.
Remember, adding a beard with other components such as nose attachments will give your gnome ornament a unique look.
Attaching the Wooden Bead Nose
For a perfect gnome Christmas ornament, the wooden bead nose must be attached carefully. Here is how to do it:
- Grab a glue gun and put a tiny bit of glue on the flat side of the bead.
- Press the bead in the middle of the ornament’s face, making sure it’s exact and symmetrical.
- Wait a few seconds until it sticks firmly.
- When done, you can add some light from behind or hang the ornament on a tree branch.
To get the right look, pick the size of the wooden bead that you like. Also, use an adhesive suitable for wood and fabric when sticking the bead. Be extra careful when placing or adjusting the bead during installation. Precision and balance are necessary for a beautiful homemade decoration.
Forming the Body
To make the body of your gnome Christmas ornaments, pick a material like felt or fabric. Cut it into a rectangle for the body. Make sure the base is flat and stable. Use hot glue or another strong adhesive to stick the edges together and form a cone.
Stuff the cone with something soft like fiberfill, cotton balls, or other material. Stuff each layer and finish with a small ball at the top.
Be creative with designs. Try polka dots, stripes, or embroidery patterns. Add accessories like hats and scarves for style. Mix and match colors in vibrant hues.
Your gnome ornament’s body is now ready for decoration. Ensure all edges have smoothly adhered together. A rough surface will make an untidy-looking ornament.
Attaching the Hat to the Body
Attaching the hat to the body of the gnome is essential for ornament-making. Follow these steps:
| 1. Put a thin line of hot glue along the inner edge of the hat’s rim. |
| 2. Quickly place the hat on top of the gnome’s head and press down firmly. |
| 3. Hold for a few seconds until it has attached properly. |
It’s important that the pieces fit together snugly, as misalignment can cause over-balancing or falling off of ornaments. Plus, hot glue dries quickly and may stick to your fingers if you’re not careful.
Adding the Yarn or String
To hang your gnome Christmas ornaments, attaching yarn or string is a must. Here’s the scoop: cut a length of yarn or string, thread a needle, find the spot on the gnome to attach the string, tie a knot, and trim any excess. Pick colors that go with your gnome and make your holiday decorations pop!
Make sure the yarn or string is strong enough to support the weight of your ornament – no breaking or slipping off! If you’re looking for more options or styles, feel free to CLICK TO SHOP ORNAMENTS for an additional charm.
Tips for creating your Gnome Christmas Ornaments
To create your perfect Gnome Christmas Ornaments, you need to follow some tips. Choosing the Right Colors, Varying Sizes, Personalizing Your Gnomes, and Displaying Your Finished Ornaments are the solutions that we will be exploring in this section. Each sub-section will provide you with the tools and knowledge that you need to make unique and personalized gnome ornaments that will add that special touch to your holiday decorations.
Choosing the Right Colors
Gnome Christmas ornaments need the perfect color scheme! To make a cohesive theme, consider these tips:
- Red and green – traditional Christmas shades.
- Metallic hues such as gold or silver – for sophistication.
- Neutrals like cream, beige or white – to balance out vibrant colors.
- Blue for a winter wonderland effect or pink for an unconventional twist.
- Contrast lighter hues with darker ones for visual interest.
Be creative! Personal preference is key. Let your imagination take charge and watch as the colors come to life!
Varying Sizes
Make diverse gnome Christmas ornaments by altering the size. Changing the size adds depth to the decorations. Big gnomes make gorgeous centerpieces, while small ones fill in gaps.
Incorporate different sizes for a perspective effect. Craft some taller and shorter pieces to distinguish each ornament. Use various colors, fabrics, and textures to make them unique.
Mixing up sizes will make your display arrangement more harmonious. Repetitive similar-sized pieces can become monotonous. Incorporate different materials and fabrics to add texture.
Varying dimensions injects unpredictability and sparks the festive spirit!
Personalizing Your Gnomes
To make your Gnome Christmas Ornaments unique, give them a personal touch! Pick colors that suit you or the recipient’s personality. You can add clothing items like scarves, hats, and boots in the chosen color scheme. Create accessories that reflect the recipient’s interests. Freckles, facial hair, and sprinkles also add a more personalized touch.
You don’t have to follow these steps in order. Enhance your Ornaments with names and special messages on little banners. Customizing them will make them stand out and add joy during the festive season!
Displaying Your Finished Ornaments
Show off your Gnome Christmas ornaments in style with these tips!
- Put them in a bowl or vase for a fancy centerpiece.
- Hang them on the tree with ribbon or twine.
- Make a special wreath with the gnomes as the main part.
- Put them on a tray or shelf to decorate year-round.
- Put them in a shadow box for a special wall art piece.
- Put them in individual gift boxes to give as presents.
Be adventurous and use them on your holiday table by putting one at each place setting. Get creative with these cute decorations!
Conclusion
Create unique and charming Christmas ornaments with a personal touch! Gather materials such as felt, fabric glue, crafting wire, stuffing, and small embellishments like pom-poms or sequins.
Cut out pieces for your gnome ornament using a template. Attach the hat to the body. Then, glue the beard and nose. Stuff your gnome with polyester filling. Top it off with any additional embellishments.
These festive ornaments make great gifts or decorations! With a few supplies and creativity, you can craft beautiful ornaments that will bring joy to any space.
Frequently Asked Questions
Q: What materials do I need to make gnome Christmas ornaments?
A: You’ll need felt, a glue gun, scissors, stuffing, cotton balls, yarn, and small decorative accents like mini pom-poms or buttons.
Q: What size should my gnome ornaments be?
A: It’s up to you! You can make them any size you like, but most people find that a height of around 4-6 inches is good.
Q: How do I shape the gnome ornament’s body?
A: Cut a large circle out of felt, fold it in half, and use a glue gun to create a seam along the curved edge. Stuff the circle with stuffing, then glue the bottom edges together and add a bit more stuffing to create a rounded body shape.
Q: How do I make the gnome’s beard?
A: Cut a strip of felt that’s about 2 inches wide and the same length as the gnome’s body. Fringe the felt by making tiny cuts along the length of the strip, then glue the uncut edge to the bottom of the gnome’s face. Trim the fringe to create a beard shape.
Q: How should I decorate my gnome ornament?
A: That’s entirely up to you! Some people like to add tiny felt hats or scarves, while others prefer to use mini pom-poms or buttons to create eyes and noses. Get creative and have fun with it!