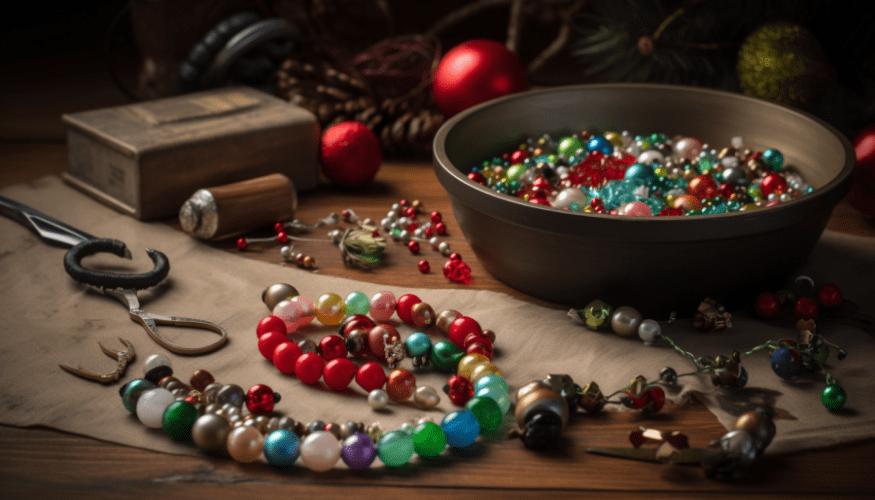
Picture a Christmas tree twinkling with the light reflected off your own handcrafted beaded ornaments, each one a testament to your artistic flair. In this tutorial, we’ll walk you through the process of creating your own beaded ornaments for Christmas, adding a unique and personal touch to your holiday decorations. With the festive season fast approaching, there’s no time to waste.
So, let’s embark on this exciting journey of beads, wires, pliers, and ribbons, and begin creating your own dazzling ornaments. Regardless of your experience level in DIY projects, this guide will equip you with all the necessary information to produce stunning, personalized ornaments that will make your Christmas tree stand out.
Materials Needed
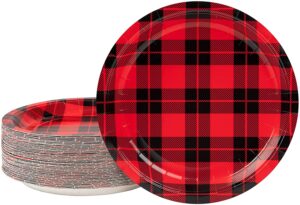
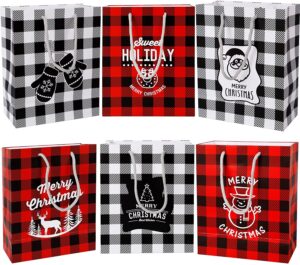
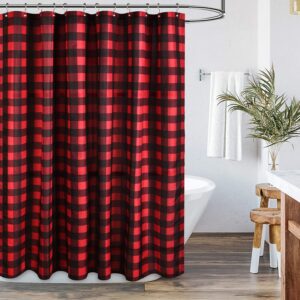
To create beautiful beaded ornaments for Christmas, you need the right materials. This is where our guide on materials needed with beads, wire, pliers, and ribbon or string comes in. Read on to discover how each of these essential materials will help you make stunning beaded ornaments that add a festive touch to your decorations this holiday season. If you’re also interested in using buffalo plaid as a Christmas décor, you might want to Discover Buffalo Plaid Ornaments.
Beads
This project requires tiny round decorative items. Get beads of various sizes and colors to make a nice design. Pick from glass, plastic, wood, metal, or clay beads to match your primary material.
For your design to turn out as expected, select a beading thread that is strong and thick. A needle with a small eye is also necessary for stringing the beads together nicely and accurately.
The number of beads needed depends on the size of the item and the amount of decoration. Plan a pattern first to figure out the right amount.
When starting the beading project, make sure you have enough space. Have good lighting and ventilation in the dedicated working area for safety.
Wire
For your project, you need wiring components. Only the right wires, chosen based on conductivity and strength, can give excellence in performance. The type of wire to get depends on the current capacity and environment.
The gauge of the wire matters too. A thicker gauge wire has less electric resistance, so it’s better for handling higher currents. Common types are copper, aluminum, or steel wires. They are good for their durability and resist corrosion.
Before picking a wire, remember factors like length, temperature range, moisture, and combustibles. So, make sure you choose the right wire for your needs.
Pliers
A Picking and Holding Tool is a must-have in any handyman’s collection! It has jaws that can clamp down and hold onto items. They can also be used to bend, shape, or strip wires.
- Nails, bolts, and screws can be extracted using this tool.
- The adjustable jaw provides a precision grip, so small pieces can be secured.
- Pliers are available in different sizes and shapes for tasks such as cutting, twisting, and shaping wires or bending metal sheets.
Electricians and mechanics love this tool due to its versatility. Plus, other added features like side cutters or crimpers make pliers the ultimate multi-purpose tool. Don’t miss it in your toolkit!
Ribbon or String
When it comes to wrapping packages or adding decorative touches, narrow material is essential. Both ribbon and string are great options. Find them at craft stores or online. The choice depends on the look you’re going for.
The ribbon is usually chosen for special occasions like weddings or holidays. It is more elegant and showy. The string is better for everyday use and can be more durable and stylish.
Measure the length you need with a measuring tape. Use scissors or another piece of ribbon/string to tie them together. Or add a bow for an extra flourish.
Remember both ribbon and string are great for wrapping gifts and making crafts. They add a special elegance to your presentation!
Choosing the Beads
You must consider various factors to choose the perfect beads for your beaded ornaments this Christmas. With the goal of achieving the best results, you should be strategic when selecting the color schemes, size, pattern, and quantity of the beads you use. These sub-sections will provide you with the solutions you need for a successful beaded ornament.
Color Schemes
When it comes to selecting beads for jewelry, color is key! The right combos can bring your design to life and add a touch of sophistication. Here are some points to keep in mind:
- Contrasting colors – Opposite sides of the wheel create a striking effect.
- Analogous colors – Adjacent shades for a harmonious look.
- Monochromatic colors – Different shades of one color for an elegant vibe.
- Triadic Colors – Three colors equally spaced on the wheel for a dynamic effect.
Remember other factors like skin tone, occasion, and preferences. With careful consideration, you can make bead colors that not only go together but also enhance your design. And don’t forget to experiment; creativity has no limits!
Size
Bead size is a key factor in jewelry’s final look. Finding the right fit is essential, as it can make or break the piece. So, when choosing a size, consider the design and purpose of the jewelry. For example, statement necklaces work best with larger beads, while earrings and bracelets need smaller ones. Remember to also check how your chosen bead size pairs with other materials such as clasps or spacer beads. Don’t rush the decision – take time to find a size that works perfectly for your project.
Pattern
Selecting beads is the first step in designing a pattern. Consider these factors:
| • Types: Glass, plastic, metal or stone beads change the look and quality. |
| • Colors: Complementary tones make an effect. Match or contrast the dominant hue to determine how noticeable the design should be. |
| • Textures: Different sizes, structures, and finishes of beads create unique designs. |
| • Complexity: Plan for intricate designs that suit your skill level. |
| • Purpose: Wearable or decorative pieces will decide which beads to use. |
Think carefully and professionally to decide between colors that complement or contrast the right texture in intricate patterns for the desired purpose.
Quantity
When selecting beads, it’s essential to think about the design and how many you need. Plan your project and estimate how many beads you’ll need. Calculating this ahead of time saves time and money.
Bead size, spacing, and pattern complexity affect how many beads you need. Larger beads may require less. Complex patterns often need more.
It’s wise to buy extra beads. This protects against running out or any other issues, such as a broken string or dropped piece.
Think about all factors when selecting the number of beads. That way, you won’t be disappointed with the final product.
Making the Ornaments
To make the ornaments in “Making the Ornaments” with “Choosing a Design, Stringing the Beads, Creating the Ornament Shape, Using Pliers to Secure the Ends, Adding Ribbon or String to Hang the Ornament” as solution briefly.
Choosing a Design
Selecting the Pattern
When you’re making decorations that reflect your style and personality, you must pick a pattern that suits your needs. Consider factors like the event, color scheme, size of decoration, and materials to make sure the outcome is aesthetically pleasing. Every design has its own unique features that must be taken into account. So, make sure you pick a pattern that highlights your skills and stimulates your creativity.
Design Elements
Once you’ve chosen the pattern, you need to think about design elements that will affect the ornament’s look. You could add ribbons, beads, or baubles for a more attractive look. Experiment with various colors and textures to get a more complex finish. But remember that each addition should match the pattern’s theme and not be overpowering.
Personalization Techniques
Personalizing ornaments make them unique. Once you have finished assembling the components, you can use different techniques to personalize them further. You can paint or inscribe text or messages on the ornament. Adding photos to it is another way to make it personal. You could also use molds or stamps to create unique shapes or logos. All these methods make your homemade decorations more personalized in a cost-effective way.
Stringing the Beads
To craft ornaments, adding beads to the string is essential. Enhancing the design of the beads makes the ornament look better and more attractive. Here’s a 3-step guide for threading beads onto an ornament string:
- Choose your bead size and pattern wisely.
- Thread one end of the string through the needle. Start carefully threading each bead onto your string in the desired pattern.
- Secure the design by knotting the ends of the string firmly together.
Remember to be patient and precise. Don’t rush or miss any step. To make your design more special, you can add pendants, bells, or charms. Experiment with different colors, shapes, and sizes of beads to add variety and character to your creations.
Creating the Ornament Shape
For crafting your ornament, take these steps:
- Decide what design you want
- Pick a material that fits the design and is easy to work with
- Draw a sketch of your design
- Shape the material using a cutter or mold
- Smooth the edges and give it a polished finish
When using materials like glass or ceramics, it’s best to use molds for uniform shapes. Be sure to take safety precautions when cutting materials such as glass or wood – it can be risky if not done correctly!
Using Pliers to Secure the Ends
Pliers – a must-have tool for fastening the edges of ornaments! With their special gripping mechanism, they securely hold onto the wire or metal parts. Using pliers to secure ends will make your ornament look more professional. Here is a 5-step guide on how to use pliers to fix ornaments:
- Select the right type and size of pliers for your material.
- Grab one end with needle-nose pliers and bend the other end.
- Then, clamp both ends with round-nose pliers.
- Repeat this method for all edges until you get the shape you want.
- Finally, cut any excess wire or twist it with wire cutters or flat-nose pliers.
Remember to be careful when handling the wire ends or you may ruin the shape or break it. Using this technique helps to save materials and create neat pieces. Now, you can make a range of unique ornaments with ease!
Adding Ribbon or String to Hang the Ornament
To spruce up the ornament, tie on some ribbon or string. Here’s how:
- Measure and cut a 6-8 inch length.
- Tie a knot at the top.
- Create a loop by making a knot with both ends of the string.
Vary it up by using different colors or widths of ribbon or string.
Decorating the Ornaments
To decorate the ornaments with the given sub-sections, the solution is to incorporate them into the ornaments effortlessly. Adding Bow or Tassel to the ornaments enhances their look while Incorporating Other Materials adds texture and depth. For adding a personal touch, there are different Personalization Options available. Once all decorations are added, do not forget the Finishing Touches to make them look perfect for the occasion.
Adding Bow or Tassel
Decorating with bows and tassels is a great way to give your ornaments a classy and sophisticated look. Follow these steps to make it happen:
- Pick the right material for your bow or tassel.
- Attach it to the ornament using glue, thread, or ribbon.
- Position the bow or tassel correctly for the best appearance.
You can also customize the size and color to match your decorations. Silk ribbons are perfect for an elegant feel, while yarns give a more rustic vibe.
These tips make it easy to add the perfect finish to your decorations. Choose the right size and style of bows and tassels to suit the ornaments’ shapes.
Adding bows and tassels to your decorations can give them a special flair. Experiment with different materials, sizes, and colors to create unique designs.
Incorporating Other Materials
Spice up your Christmas ornaments with materials like fabric, ribbons, felt, and more! Glue on sequins, beads, and pearls for a fancier look. Balance the design by not overdoing it with too many details. Match the ornament theme and color scheme when combining materials. Add a rustic touch with twine or jute bows.
Express yourself with unique materials this holiday season! Make your decorations stand out from the rest.
Personalization Options
Want to customize ornaments? Options are endless! Add names, dates, unique symbols, and designs. Depending on the material, use permanent markers or engraving tools. Choose from colors, fonts, and make it stand out. Special messages and quotes add sentimental value. Incorporate holiday themes like snowflakes, reindeer, and Christmas trees. Personalization is easy and fun! Gifts or for yourself, personalized ornaments add a special touch.
Let your imagination run wild and create something truly one-of-a-kind this festive season.
Finishing Touches
The final touches of the ornaments are the ‘crowning glory’ of any decoration. Ribbons, beads, and glitters come in various forms to increase the beauty of your ornament. Adding a unique style – be it traditional or modern – goes beyond just aesthetics, but also conveys your individual character. Thus, you create something meaningful that can proudly adorn any tree or mantle.
Tips and Tricks
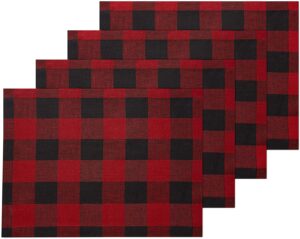
To master the art of making beaded ornaments for Christmas, you need to know some tips and tricks for working with wire. While creating the ornaments, you may run into some common issues that need troubleshooting. In order to keep your ornaments in perfect condition, you need to know how to maintain them. Lastly, storing your ornaments is crucial to make sure they remain in pristine condition for years to come. For a unique touch, you can also explore the world of buffalo plaid ornaments. Explore festive decorations on our website.
Working with Wire
Manipulating wire requires keen eyes, a steady hand, and some know-how. Here are 3 tips for successful ‘metallic cord’ manipulation:
- Find the right type of wire. Different metals work better in different applications, so pick the best one.
- Bend with care. Methodical approaches and the right tools prevent unwanted kinks.
- Cut with sharp tools. Blunt force deforms metal, altering its properties and weakening structures.
Plus, keep your workspace tidy. Cleanliness helps you stay focused and prevents wire mishaps.
Troubleshooting Common Issues
For any issues that appear, here are the steps:
- First, figure out the problem and its cause. Look in your system logs or run tests.
- Then, attempt to solve it with help from specialists & forums.
- If that doesn’t work, get expert help from reliable resources & teams.
It’s important to stay informed of new issues and solutions. Keep a record of successful fixes for later.
Maintaining Your Ornaments
Caring For Your Precious Ornaments? Yes, Please!
To keep them looking like new, certain rules must be followed. Avoid harsh chemicals and extreme temperatures. Store in a cool, dry place to stop dust and scratches. Handle them with clean hands and use mild cleaning agents.
Special types of ornaments need special care. For example, perfume and hair products can harm gemstone and pearl jewelry. Silver tarnishes quickly and needs frequent polishing.
Follow these tips and tricks. Then you can enjoy your ornaments for years! No more worrying about damage or loss of value.
Storing Your Ornaments
To keep your precious ornaments safe, there are a few things you can do!
Wrap each one in acid-free tissue paper or bubble wrap before putting it into a storage container. This stops scratches and damage. Put dividers or compartments in the container too, to stop ornaments rubbing against one another.
Label your storage container with what’s inside. Use labels outside or tags per compartment – easy to find specific ornaments later.
Store ornaments in cool, dry places like an attic or closet – avoid damp areas that cause mold or extreme temperatures that harm delicate materials.
A bit more time and care when storing your ornaments will help them last longer.
Frequently Asked Questions
1. What materials do I need to make beaded ornaments for Christmas?
You will need beads, wire, pliers, scissors, and any embellishments you wish to add.
2. How do I choose the right beads for my ornaments?
You can choose beads in different shapes, sizes, and colors to create your desired look. It’s important to make sure that the beads you choose are compatible with the wire you will be using.
3. Can I make beaded ornaments with my kids?
Yes, making beaded ornaments is a fun activity for kids and adults alike. However, adult supervision is needed when using pliers and scissors.
4. How can I create different designs with my beaded ornaments?
You can create different designs by using different bead patterns, shapes, and colors. You can also add embellishments that fit your desired look.
5. Do I need any specific skills to make beaded ornaments?
No, you don’t need any specific skills. You just need to be patient and follow the instructions carefully. You can also find tutorials online or in craft stores.
6. Can I use my beaded ornaments as Christmas gifts?
Yes, beaded ornaments can make lovely Christmas gifts for your loved ones. You can personalize them by creating the ornaments in their favorite colors or using their initials or names as embellishments.